| If you are having trouble seeing images in this email, please click on this. |
 |
 |
 |
The world’s first English version of Ragnarok Online 2 started Open Beta on 3rd January 2013 and we have seen the victorious rise of many an Asgardian! For our brave adventurers who have already reached level 50, many of you might be wondering – what’s next?
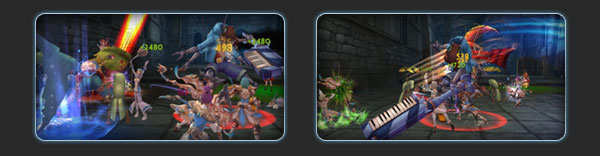
Well, sharpen your blades, pack your potions and count your arrows! It’s time to venture into the Culvert of Abyss in search of awesome rewards and loot! |
|
 |
 |
| Dungeon name: |
Culvert of Abyss |
| Dungeon Location: |
Verta Delta 11o'clock near waterway |
| Entry Level: |
50 |
| Entry Condition: |
Delivery Key Quest Complete (Lvl 50 quest) |
| Bosses: |
Rockstar Heroes, Golden Robberbug, Mini&Mongi, Aromine, RatMaster Kremp
|
|
|
 |
|
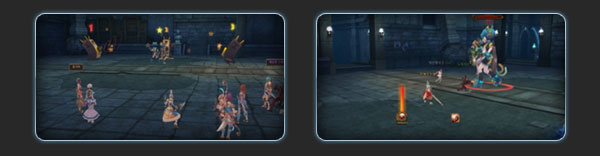
| #1. Boss: Rockstar Heroes |
 |
Area of Appearance: 1 Area
Boss Skills: Guitari, Vokari, Piani |
Rockstar Heroes #1 Tip: Watch for the Crazy Fans!
When you battle with the Rockstar Heroes, each boss will summon Crazy Fans. These secondary mobs will become stronger as time goes by.
After a certain time, Crazy Fans will evolve into Groopies and they will attack the Rockstar Heroes.
Depending on the strength of your party, you might decide to kill these Crazy Fans from the start or wait until they become your allies. It’s your choice!
Band Reunion + Peak of Highlight
After a period of time, Rockstar Heroes will use a warp skill called "Band Reunion". Each boss will then teleport to a fixed location within the area and start casting the spell after using "Peak of Highlight".
Once the spell has been cast, the bosses will use a wide area attack. It is important that the party figures out the fixed locations of the three bosses and to stay within areas where the "Peak of Highlight" cannot reach.
|
|
|
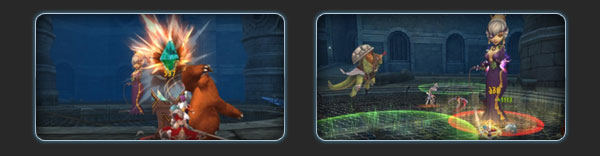
| #2. Boss: Golden Robberbug |
 |
Area of Appearance: 2 Area
Mobs to Defeat: Golden Robberbug, Golden Robberbug's Egg |
Golden Robberbug #1 Tip: Quickly kill the Baby Robberbug!
The eggs of the Golden Robberbug are set in a circular arrangement around it. When the battle begins, Newborn Robberbugs will emerge from this egg at certain times.
If these Newborn Robberbugs are not killed off quickly, they will evolve into Growing Robberbugs that will subsequently grow into Complete Grown Robberbug!
Complete Grown Robberbugs deal out long distance attacks to random targets, so the party’s best strategy is to kill the Newborn Robberbugs before they become full grown!
Figure Out Color of Aura
When the Golden Robberbug’s HP level drops to a certain amount, it will adopt one of three color auras. During this time, the different-coloured auras will determine the different effects that will affect the Golden Robberbug.
1. Red Aura: The Golden Robberbug’s movement speed will slow down but its attack power becomes very strong. In this case, the Golden Robberbug’s damage will be stronger than the party healer’s healing spells, so the party tanker should minimize overall damage by moving and kiting the slow-moving Golden Robberbug around.
2. Blue Aura: The Golden Robberbug will suddenly increase in movement speed while its attack power decreases. At certain times, its target will change and this target will require a lot of quick heals!
3. Gold Aura: During the fight, there will be certain times when the Golden Robberbug will become unbeatable. When the golden aura appears, a special floor will be created.
The party tanker should kite the unbeatable Golden Robberbug to this floor – once it is there, his unbeatable status will disappear and the party that steps on this same floor will get a speed and attack power increase! This is the time to tank and spank!
|
|
|
| #3. Boss: Guitar Duo of Abyss (Mini&Mongi) |
 |
Area of Appearance: 3 Area
Mobs to Defeat: Mini&Mongi, Mini&Mongi's Speaker |
Mini&Mongi #1 Tip: Kill the DJ Juniors and the Speaker as quickly as possible!
Upon entering the boss room, the party will see three Speakers set around Mini&Mongi. These Speakers are basically unbeatable, and protecting them are the DJ Juniors.
When the battle starts, the Speaker will cast a buff that increases attack power and defense of the Mini&Mongi. The party’s best strategy is to quickly kill the protective DJ juniors before destroying the Speakers!
Eardrum Damage Debuff
Among the various skills that Mini&Mongi employ is the deafening Eardrum Damage Debuff. This debuff is a skill that will kill the player instantly when it has accumulated three times.
Asgardians, always check the debuff status on the upper right hand side of your screens!
Party tankers that deal directly with Mini&Mongi have a high possibility of accumulating this debuff, so after accumulating it two times, the other tanker should take the first tanker position. |
|
|
| #4. Boss: Aromine |
 |
Area of Appearance : 4 Area
Mobs to Defeat: Frog Queen Aromine, Kobug Lord |
Aromine #1 Tip: Destroy the Seal Stones first!
Aromine's area is marked with three Seal Stones that make it unbeatable. The party has to first destroy these Seal Stones in order to make Aromine vulnerable to attack!
Party Members, Spread Out!
When Aromine’s HP drops to a certain amount, the Kobug Lord will be summoned.
It is impossible to tank the Kobug Lord as it will periodically and randomly change its attack target. It is hence better to attack Aromine with the party members spread out widely to avoid absorbing damage from the bosses while dealing their own.
|
|
|
| #5. Boss: RatMaster Kremp & Turtle Assassins |
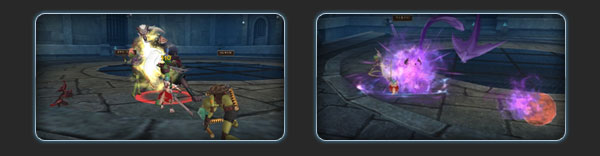 |
Area of Appearance: 5 Area
Mobs to Defeat: RatMaster Kremp, Turtle Assassins |
RatMster Kremp #1 Tip: Quickly kill the Turtle Assassins when they appear!
When the battle begins, the RatMaster Kremp is of an unavailable status and will summon Leo, the chief of the Turtle Assassins.
When Leo’s HP drops to below a certain amount, it will summon additional Turtle Assassins. If the party can't defeat them quickly enough, they will end up facing RatMaster Kremp as well four Turtle Assassins!
Therefore, it’s important for the party to work hard to defeat these mobs quickly.
Core of Energy and Fragment of Energy
During the battle, when RatMaster Kremp’s HP falls to a certain amount, it will summon the Core of energy. Destroy this core quickly as it increases RatMaster Kremp's attack power periodically!
When the Core of Energy has been destroyed, it will result in a surrounding Fragments of Energy that will deal out both a damage and defense decrease debuff together.
Therefore, melee attackers should avoid the Fragments of Energy as soon as the Core of Energy is destroyed, and long distance damage dealers should eliminate the Fragments of Energy.
Shadow of Abyss
The Shadow of Abyss that is summoned by RatMaster Kreamp is really slow. However, the target that is attacked by the Shadow of Abyss will meet with instant death! So always be wary of the Shadow of Abyss when it is summoned and avoid it at all costs!
|
|
|
Now that we’ve armed you with the strongest boss fight tips, rally your party members and experience the Culvert of Abyss today! May the strongest Asgardians survive! |
|
 |
| Click here to unsubscribe. |